The Insperix support web site is designed to allow you to quickly:
In order to create and monitor cases you first need to register as a user. It is a quick a simple process.
Just click the 'Register' button on the Support homepage and fill out the mandatory fields. You will be sent
a registration code which is only required the very first time you log in. All information is held in the strictest
confidence and is not disseminated to anyone else.
If the information you require is not explained here, please contact us and we
will get back to you as soon as possible.
Logging New Cases
In order to create new cases, first log in to the support site. You will be presented with a screen like this:
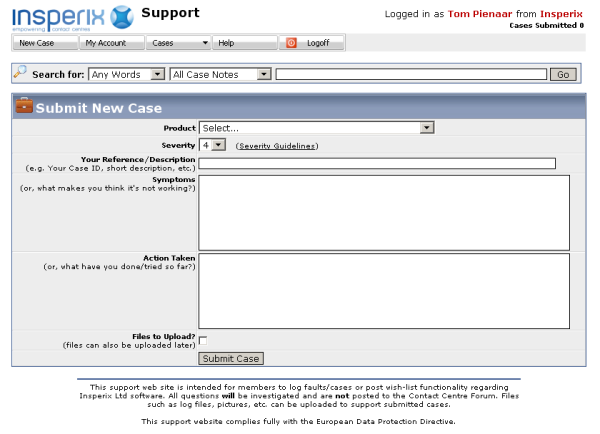
Fill out this form with these details:
When the above has been completed, click 'Submit Case'. If you have files to upload you will be presented with a popup
window from which you can upload as many as you wish.
Please ensure that ALL files to be uploaded are zipped.
Insperix will be informed by both email and SMS text message of your new case and will respond in an appropriate time
frame to the severity chosen and the service level agreements in place.
Monitoring Cases
Any case created by you or your company can be monitored by logging in and clicking 'My Cases' or 'Company Cases'.
You will see a screen listing the cases as follows:
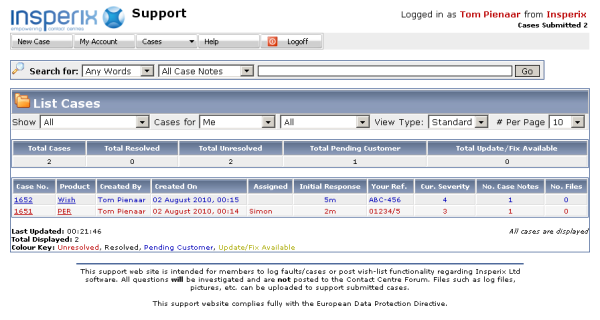
The cases are colour coded depending on whether they are:
The cases listed here are updated every 5 seconds. Selecting the case number will allow you to view/update the case details.
If there are many cases shown here then a paging system will be shown below the list of cases and the filter at the top
of the page can be used to narrow down a search.
Viewing/Updating Existing Cases
Cases you or your company have opened can be updated at any time. Log in and click 'My Cases' or 'Company Cases'.
Then select/click the required case number to view/update. The top portion of the screen when viewing a case
will look like this:
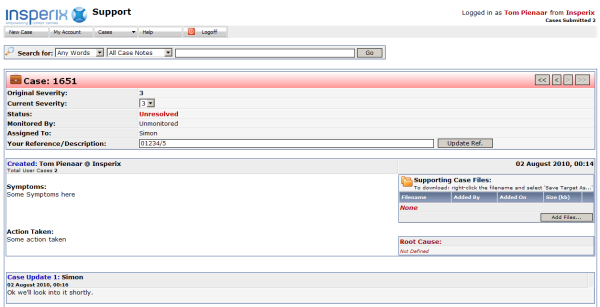
Here we can see the top is colour coded to the case status as described in the previous section.
You are allowed to change the severity, for instance, to start escalating a problem or the 'Your Reference'
field.
Below this is the original description of the problem (Symptoms and Action Taken). On the right of this are any
associated case files. You may add new files here if required. Below this is the 'Root Cause' which is added once
the final solution has been established and/or implemented.
This is followed by all the case updates created by either Insperix or yourself, or your someone in your company.
If you scroll down you will see a section like this:
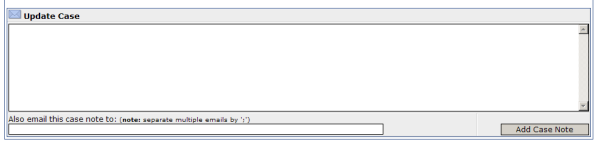
This is where you can add additional information. You may also like to forward these case note details on
to additional email addresses. These can be entered (seperated by a semi-colon ';') in the field below the Update Case field.
When completed click the 'Update Case' button.
The Insperix support team will be notified by email of the new case notes (and possibly by SMS too depending on the case)
as will all members who have had input to this case.
Use as a Knowledge Base
From the main page you can type some search criteria into the search field. Possible cases will show like this:
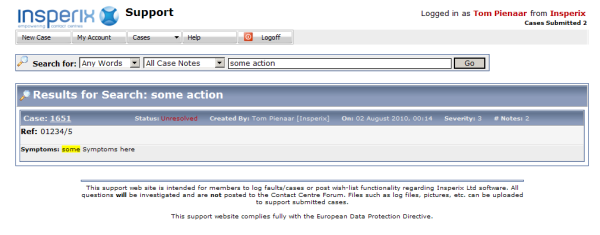
Select the case number to view.
Note:In the Search drop down fields if you select 'Just Original Case' then the search will only be performed
on the Symptoms and Action Taken of the original case. The options 'All Case Notes' will search all case notes.
|
| | | | |